TL;DR: Painting over dark walls takes more than one coat of light color. This covers the prep, primer, and technique pros use to cover dark colors cleanly without bleed-through.
The Challenge of Dark Colors
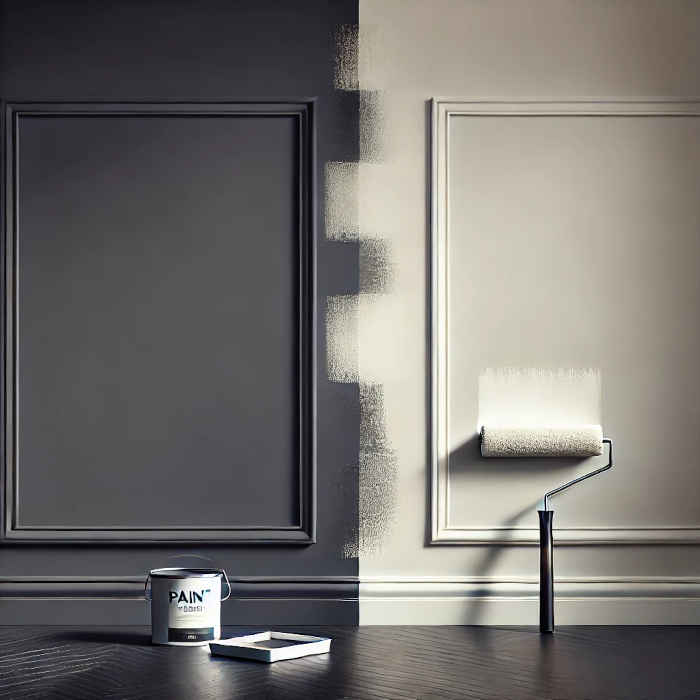
Painting over dark colors comes with unique challenges. Dark colors can bleed through lighter paint if not properly addressed. The deep hues often require extra preparation and materials to ensure complete coverage. Another issue is the surface texture and finish. Glossy dark paints can be especially tricky as they resist new paint adherence. Without the right preparation, your new paint can streak or peel. Addressing these issues is key to a successful color transition. Proper preparation and understanding of materials can turn this challenge into a satisfying DIY success.Essential Tools and Materials
For a successful paint job, gather essential tools and materials. Quality tools can make a noticeable difference in your results. First, you’ll need reliable brushes and rollers. These tools help achieve a smooth finish. A paint tray or grid is also useful for even paint loading. Next, protective gear is crucial. Use drop cloths to shield floors and furniture. Tape is essential for clean lines around edges and trim. Here’s a quick list of what you’ll need:- High-quality brushes and rollers
- Paint tray or grid
- Drop cloths and painter’s tape
- Sandpaper and a putty knife
- Primer and paint suitable for your project
Step 1: Wall Preparation
Proper wall preparation is a key step before painting over dark colors. It ensures that the new paint adheres well. Start by cleaning the walls thoroughly. Remove dust, dirt, and grease, which can affect paint adherence. A mild detergent solution works best for this task. Next, inspect the walls closely for any cracks or holes. Use a putty knife to fill these imperfections with a quality filler. This provides a smooth surface for painting. Finally, sand the walls to create an even texture. This step is crucial, especially on glossy surfaces, to help the primer and paint bond effectively.Step 2: Priming the Walls
Priming is essential when painting over dark colors. It acts as a base coat that blocks the dark shade beneath. Choose a high-quality primer for the best results. Opt for a tinted primer if you’re transitioning to a lighter color. Tinted primers help provide better coverage and can make the final color more vibrant. Apply the primer evenly across the walls. Use a brush for edges and corners, and a roller for larger areas. This ensures complete coverage and a smoother finish. Depending on the darkness of the original color, multiple coats of primer may be necessary. After the first coat dries, check for any bleed-through and address it with an additional coat if needed. Allow the primer to dry thoroughly before moving on. Sufficient drying time helps the subsequent paint adhere better, ultimately contributing to a durable finish.Step 3: Choosing the Right Paint
Selecting the appropriate paint is crucial for success. Consider factors like color, sheen, and paint type. Lighter colors can brighten and open up a space. They often need fewer coats than darker hues, especially over primer. Choose a finish that suits the room’s function. Matte and eggshell finishes hide wall imperfections, while satin is more durable for high-traffic areas. Consider using paint with built-in primer. This can enhance coverage and reduce the need for multiple layers, saving time and effort. Before committing, test potential colors in different lighting. This ensures you achieve the desired atmosphere and complements your existing décor.Step 4: Painting Techniques for Even Coverage
Proper technique is crucial for even coverage. Start by cutting in the edges with a quality brush. This allows you to maintain crisp lines around corners and edges. Use a high-quality roller to apply paint to larger areas. Ensure the roller is fully loaded but not dripping. Even rolling pressure prevents streaks and patches. Maintain a wet edge when painting. This technique reduces lap marks and ensures a uniform appearance across the wall’s surface. Always work in sections, blending each new stroke with the previous one. This prevents visible lines and creates a seamless finish throughout the room.Step 5: Applying Multiple Coats
Multiple coats may be necessary when covering dark colors. A single coat often does not provide full coverage. Begin with a primer, but be prepared to apply multiple layers of paint too. This ensures no dark hues show through the new color. Ensure each coat dries fully before applying the next. This patience prevents paint from lifting or peeling later. Examine the walls under good lighting between coats. This helps spot any areas needing extra attention or touch-ups before proceeding.Step 6: The Finishing Touches
After applying all necessary coats, inspect the walls closely. Look for any uneven spots or missing areas that need an extra touch. Once satisfied with the coverage, remove any masking tape carefully. This prevents peeling the fresh paint, ensuring crisp, clean lines. Clean up any accidental spills or drips immediately. Wet paint is much easier to clean than when dry. Finally, allow the paint to cure properly. Waiting a few days before rehanging decorations or moving furniture back ensures a lasting finish.Additional Tips for a Professional Finish
A successful paint job often relies on minor details. For a smooth result, focus on technique and consistency. Ensure a steady hand when painting edges or intricate areas. This is where precision truly makes a difference. Consider the room’s natural and artificial lighting. This can alter how the paint color ultimately appears. Here are some additional tips to elevate your paint job:- Use a paint grid in the bucket for even roller loading.
- Keep a damp cloth handy for quick spill clean-up.
- Maintain a wet edge to avoid visible lap marks.
- Practice patience; it’s key to achieving a superb finish.
Conclusion: Enjoying Your New Space
Transforming your home by painting over dark colors is both rewarding and challenging. By following these professional tips, you can achieve stunning results. Take a moment to admire your new space. The effort in preparation and painting allows you to enjoy a fresh, inviting atmosphere. Remember, a good paint job doesn’t just improve aesthetics. It can also affect mood and comfort. Relish the harmony your new colors bring to each room.Frequently Asked Questions
How do you paint over dark walls?
Start with a quality primer, often tinted toward the new color, then apply two or more even topcoats. Primer keeps the dark color from bleeding through.
Do you need primer to cover dark paint?
Primer is strongly recommended over dark colors. It blocks the old tone and reduces the number of topcoats needed.
How many coats to cover a dark wall?
After priming, two topcoats are typical, though very dark or bold colors may need an extra coat for even coverage.
Related Reading
- Why Primer Matters: The Key to Long-Lasting Paint Jobs
- Which Paint Sheen Is Right for Your Project?
- How to Maintain Your Home’s Paint Finish
Views Expressed Disclaimer
The views, opinions, and information presented in this article are for informational purposes only and do not necessarily reflect the official policies or positions of Chagrin Falls Painting Company. While every effort has been made to ensure accuracy, Chagrin Falls Painting Company is not liable for any errors, omissions, or decisions made based on the content provided. Readers are encouraged to consult professionals for specific advice or assistance related to their unique circumstances.