As an Amazon Associate, I earn from qualifying purchases. Privacy Policy / Terms
Cabinets are the heart of every kitchen. They set the tone for the room’s aesthetic and functionality. But over time, they can start to look worn and outdated.

Enter the power of paint. A fresh coat can breathe new life into your cabinets, transforming your kitchen without breaking the bank.
This comprehensive guide will provide you with practical cabinet painting tips. It’s designed to help you navigate the process of updating your cabinets with paint, a cost-effective makeover for 2025.
From preparation to the final touches, we’ll walk you through each step. You’ll learn about the latest color trends, how to choose the right paint, and even how to avoid common mistakes.
So, whether you’re a seasoned DIY enthusiast or a first-time painter, this guide has something for you. Let’s dive in and start transforming your kitchen.
Why Choose Paint for Your Cabinet Makeover?
Opting to paint your cabinets can be a game-changer. It offers a fantastic way to refresh your kitchen’s look without the cost of new cabinetry.
A fresh coat of paint can profoundly alter your space. It allows you to inject personality and flair while maintaining a tight budget.

Painting cabinets is not only cost-effective but also environmentally friendly. By reusing existing materials, you cut down on waste.
Moreover, painting provides unmatched flexibility. You can easily change the mood of your kitchen by updating colors to match current trends or personal tastes.
Finally, painted cabinets can increase your home’s resale value. Potential buyers appreciate updated, stylish kitchens, making paint a wise investment.
Preparing for Your DIY Cabinet Painting Project
Embarking on a DIY cabinet painting project is exciting but requires careful planning. Proper preparation is key to success.
First, assess the current state of your cabinets. Identify any damage or wear that might need addressing before you begin painting.
Taking time to plan your project helps prevent unwanted surprises. A well-organized project reduces stress and leads to better results.
Additionally, set a realistic timeline for your project. Painting cabinets isn’t an afternoon task—it requires patience and precision.
Before painting, ensure you’ve chosen the right color and finish. These choices significantly impact the final look and durability of your cabinets.
Organize a checklist to track necessary steps and materials. This keeps your project on schedule and within budget.
Gathering all required tools in advance is crucial. Interruptions to fetch supplies can slow progress and cause frustration.
Proper ventilation is also important for safety and effective drying. Choose a well-ventilated area free from dust and debris.
Consider lighting conditions in your work area. Proper lighting ensures accurate color application and helps spot imperfections.
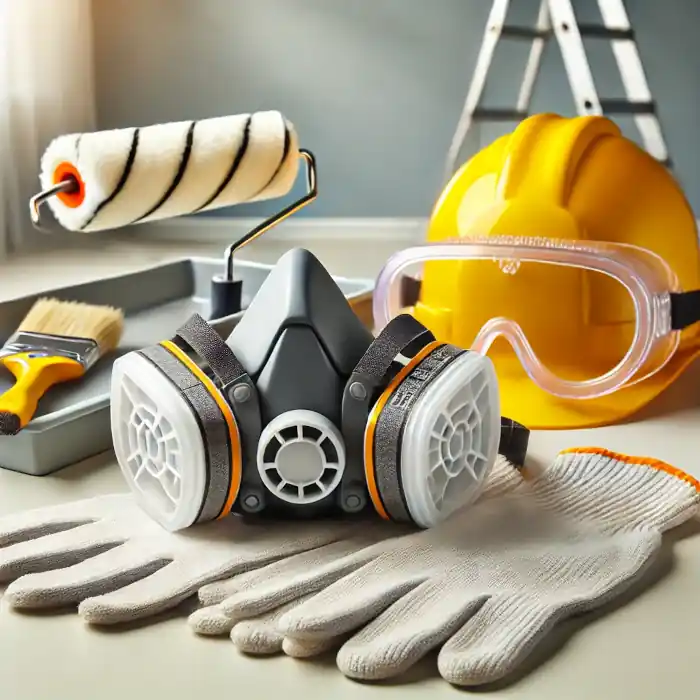
Finally, don’t forget about protective gear. Wearing appropriate safety equipment shields you from paint fumes and dust.

Setting Up Your Workspace
A well-prepared workspace is vital for your DIY success. Clear the area around the cabinets you intend to paint.
Remove items from countertops and cover nearby appliances. This protects them from accidental splashes and dust.
Use drop cloths or plastic sheeting to cover floors. Doing so prevents paint drips and makes cleanup easier later.
Keep your tools within easy reach. Having everything organized avoids unnecessary disruptions during the process.
Ensure your workspace is well-lit and ventilated. Good lighting and airflow lead to a cleaner, more precise paint job.

Tools and Materials You’ll Need
Having the right tools and materials is crucial for a smooth cabinet painting process. Here’s a quick list of essentials:
- Sandpaper and sanding block
- High-quality paintbrushes and rollers
- Painter’s tape
- Primer and your chosen cabinet paint
- Screwdriver for removing hardware
- Drop cloths or protective sheeting
Invest in quality brushes and rollers to achieve a professional finish. Cheap tools can leave unwanted brush strokes and imperfections.
Choose a primer that suits your cabinet material. Primer improves paint adhesion and gives a uniform base color.
Painter’s tape is indispensable for achieving clean lines. Use it to protect edges and other areas you don’t want painted.
Lastly, don’t forget small items like screwdrivers. These are necessary for removing cabinet doors and hardware efficiently.
Double-check your list before starting to ensure no interruptions. Having everything on hand will keep your momentum going.

Step-by-Step Guide to Painting Your Cabinets
Transforming your cabinets with paint involves several crucial steps. Each stage adds to the overall quality of the final product.
Begin by selecting a start date with favorable weather. Temperature and humidity impact paint application and drying.
Ensure you allocate enough time for each phase. Rushing can lead to mistakes, requiring additional effort to correct.
Have a dedicated area for painting doors separately. This allows for thorough coverage and easier access.
It’s essential to label doors and hardware before removal. This avoids confusion when reassembling your cabinets.

Step 1: Cleaning and Degreasing
Start by thoroughly cleaning your cabinets. Use a degreaser to remove any oils and residues. These can prevent the paint from adhering properly.
Rinse the cabinets with clean water after degreasing. Ensure all cleaner residues are gone before proceeding.
Let the cabinets dry completely. This step is vital as moisture can affect sanding and paint application.
Consider using a fan to speed up the drying process. Proper drying minimizes delays and potential paint issues.
Clean cabinets create a smooth foundation for further preparation. Neglecting this step can compromise the whole project.

Step 2: Sanding for a Smooth Finish
Once the cabinets are clean, move on to sanding. Sanding helps roughen the surface, allowing paint to grip better.
Use medium-grit sandpaper to smooth out imperfections. This process also removes old finishes that might hinder new paint.
Focus on corners and detailed areas. These spots often collect old paint and grime, needing extra attention.
Remove all sanding dust with a vacuum and tack cloth. Dust can mix with paint, causing a gritty texture.
A well-sanded surface ensures a clean finish. It prepares the cabinetry for primer and paint layers effectively.

Step 3: Removing Doors and Hardware
Next, carefully remove cabinet doors and all hardware. Label each piece, as reassembly can be daunting without guidance.
Use a screwdriver for this process. Power tools can be too forceful, risking damage to the cabinetry.
Place screws and knobs in labeled bags. This keeps everything organized and easily accessible.
Removing doors makes painting more manageable. It allows for even application on both the cabinet and the door surfaces.
With hardware removed, cleaning, sanding, and painting become more efficient. It provides more room to work without obstructions.

Step 4: Applying Primer
Before applying paint, apply a coat of primer. Primer is key to achieving an even color and lasting finish.
Choose a primer suited to your cabinet material. This will ensure the base coat sticks without peeling.
Use a brush or roller to apply the primer evenly. This initial coat should cover all visible surfaces.
Allow the primer to dry thoroughly. Refer to the manufacturer’s instructions for the recommended drying time.
Priming prepares the surface for paint, reducing absorption. It helps achieve the true color of your topcoat.

Step 5: Choosing the Right Paint
Selecting the right paint is crucial for durability. Consider both color and the type of finish for best results.
Semi-gloss or satin finishes work well for cabinets. They offer a balanced sheen and are easy to clean.
Choose high-quality, durable paint brands. These resist chipping and wear, protecting your hard work.
Decide on a color that fits your kitchen’s theme. This enhances the overall aesthetic of your space.
Consider eco-friendly options with low VOCs for safety. These paints are better for both your health and the environment.

Step 6: Painting Techniques for a Professional Finish
Achieving a professional finish involves careful technique. Start by painting the edges and detailed areas with a brush.
For larger surfaces, switch to a foam roller. This ensures a smooth and even application without brush strokes.
Maintain a wet edge to prevent lap marks. This technique helps unify the finish and avoid inconsistencies.
Consider using a paint sprayer for a flawless look. Sprayers can offer a very smooth finish with less effort.
Take your time with each coat. Thin, even layers prevent runs and ensure the best coverage possible.

Step 7: Drying and Reassembly
After the final coat, drying is crucial. Allow ample time for the paint to cure fully to avoid smudging.
During drying, keep doors and windows open for ventilation. Proper airflow aids the drying process and minimizes fumes.
Inspect your work before reassembly. This is the last chance to address any touch-ups needed for a perfect finish.
Carefully reattach doors and hardware. Follow your labels to ensure everything goes back to its original place.
Take a moment to admire your handiwork. Successfully reassembling marks the project’s completion and your kitchen’s fresh look.

Color Trends and Choosing the Right Hue for Your Cabinets
Choosing the right paint color is crucial when updating your cabinets. The right hue can completely transform your kitchen’s atmosphere. It’s essential to consider current trends and how they fit with your space.
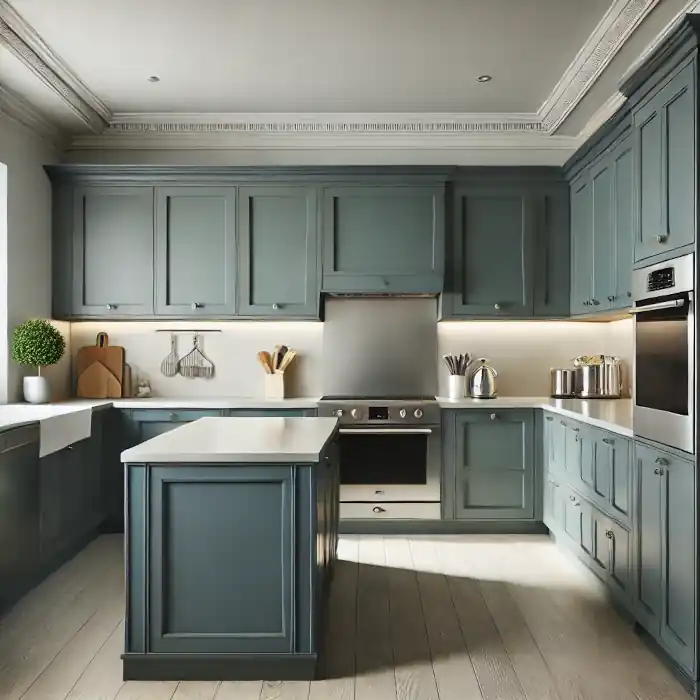
Light colors can make a small kitchen appear larger. They reflect more light and create a feeling of openness. Darker shades, however, add depth and a sense of luxury.
Neutral tones such as whites and grays remain popular. They offer versatility, easily matching various design elements. These colors can adapt as trends and personal tastes evolve.
Don’t forget to test paint samples before committing. Different lighting conditions will affect how the color looks. Swatches help visualize the end result in your actual kitchen.
Ultimately, choose a color that speaks to your style. This space should feel comfortable and inviting for you and your family.

The Impact of Color on Kitchen Aesthetics
Color plays a significant role in kitchen design. It can set the tone and mood of your cooking space. Your cabinet color may also influence how other features are perceived.
Bright colors, for example, can energize a room. They often make the kitchen feel lively and active. Soft pastels and muted tones, on the other hand, create a calm and soothing vibe.
Cabinet colors should harmonize with flooring, walls, and countertops. This integration impacts the room’s flow and coherence. Ensuring a balanced color scheme enhances your kitchen’s design unity.

2025 Color Trends for Kitchen Cabinets
As we look toward 2025, exciting color trends emerge. Earthy tones are predicted to be popular, such as terracotta and muted greens. These shades bring warmth and natural appeal to kitchen spaces.
Deep blues and rich berries will also be in vogue. They offer a striking contrast against lighter backgrounds and accessories. Such bold choices can create focal points in modern kitchens.
Sustainability influences color trends too. Expect to see more eco-conscious paint options. These align with the growing demand for environmentally friendly designs.
Your choice should reflect personal taste and function. Whether following trends or setting your own, make your kitchen a space you love.

Finishing Touches: Hardware and Maintenance
Once your cabinets boast fresh paint, it’s time to think about finishing touches. These include selecting hardware and planning maintenance. These elements not only complete the look but also ensure longevity.
Hardware plays a key role in your kitchen’s design. It offers both functionality and aesthetic appeal. Choose pieces that enhance and complement your new cabinet hue.
Proper maintenance of painted cabinets is crucial. This helps keep them looking pristine for years to come. Regular cleaning prevents buildup and preserves the finish’s integrity.
Consider how you use your kitchen daily. This will guide hardware choice and maintenance habits. Practicality should align with style for a harmonious kitchen environment.

Selecting Hardware to Complement Your Painted Cabinets
Hardware selection should be a thoughtful process. It’s an opportunity to add character to your kitchen. Handles, knobs, and pulls come in various styles and finishes.
Consider contrasting finishes for striking effects. Matte black handles against white cabinets create a contemporary look. Classic brass on rich, dark tones offers timeless elegance.
Align your hardware choice with the overall kitchen theme. Ensure cohesion with lighting fixtures and faucets as well. This consistent approach keeps the design seamless.
While aesthetics matter, comfort in use is key. Test different options for feel and ease of grip. The right hardware should blend function with form.

Maintaining Your Newly Painted Cabinets
Maintenance begins with gentle cleaning routines. Use mild soap and warm water for daily upkeep. Avoid harsh chemicals which can damage the paint.
Regular dusting prevents grime buildup. Soft cloths or dusters work well for this task. Pay attention to door frames and less-obvious spots.
Promptly address spills to avoid stains. Use a damp cloth and dry immediately after. This practice preserves the paint’s vibrancy over time.
Inspect hardware regularly for tightness. This ensures that handles remain secure. Loose hardware can cause unnecessary strain on painted surfaces.
Schedule periodic touch-ups if needed. A small paint pot can be handy for quick fixes. A little effort maintains your cabinets’ fresh appearance.

Common Mistakes and How to Avoid Them
Embarking on a DIY cabinet painting project can be rewarding. Yet, common mistakes can turn triumph into frustration. Awareness and preparation are key to avoiding pitfalls.
Rushing the prep work is a frequent error. Skimping on cleaning or sanding leads to poor adhesion. Invest time here for smoother results later.
Selecting the wrong type of paint is another misstep. Opt for durable and easy-to-clean options. Consider the demands of your kitchen environment when choosing.
Inadequate priming can result in uneven finishes. Primer improves paint adhesion and brings out colors. Ensure complete coverage before applying the main coat.
Ignoring drying times often leads to smudges. Patience between coats allows proper curing. Follow paint can instructions for best outcomes.
Neglecting to use painter’s tape might cause messy lines. This simple tool delivers crisp, professional edges. Always tape off areas for cleaner transitions.
Avoid these mistakes with these simple tips:
- Thoroughly clean and degrease surfaces.
- Sand cabinets for an even base.
- Use appropriate paint for cabinets.
- Allow sufficient drying between coats.
- Employ painter’s tape for precise edges.
Underestimating the effect of lighting can skew colors. Test paint samples under various light conditions. This helps achieve the desired shade consistently.
Not labeling hardware or cabinet doors causes confusion. Organize and label to simplify reassembly. A bit of planning saves time and headaches later.
Compromising ventilation results in inadequate drying. Ensure proper air circulation throughout the process. This helps paints cure correctly and reduces odors.
Lastly, failing to inspect final finishes overlooks flaws. A detailed check ensures smooth and even surfaces. It’s your chance to perfect the project before completion.

Budgeting and ROI: Is Painting Your Cabinets Worth It?
Painting cabinets offers a budget-friendly makeover option. Compared to total replacement, it’s significantly less costly. This approach allows you to refresh your space without breaking the bank.
Budgeting for a DIY cabinet painting project is crucial. Consider costs of paint, primer, and materials. Factor in your time and any unexpected expenses, such as repairs or additional tools.
The return on investment can be quite favorable. Freshly painted cabinets enhance kitchen aesthetics, potentially boosting resale value. Buyers often appreciate an updated kitchen, offering higher returns.
Remember that a successful paint job is influenced by the quality of work. Professional-looking finishes can significantly elevate perceived value. Make sure you’re meticulous with each step of the process.
Beyond financial benefits, there’s the satisfaction of a completed project. DIY cabinet painting provides a personal sense of achievement. You transform your home while gaining valuable skills.

Conclusion: Enjoying Your Kitchen’s New Look
Updating your cabinets with paint is a rewarding endeavor. It transforms your kitchen into a vibrant, renewed space. A fresh coat of paint can completely alter the room’s ambiance.
The transformation is not just about appearances. You’ll experience a great sense of accomplishment. Completing this project enhances your DIY skills and boosts confidence.
Each step, from preparing to the final touches, plays a crucial role. Your attention to detail ensures a professional-looking result. Revel in the beauty of your newly painted cabinets every time you step into your kitchen.
The impact of updated cabinets can extend beyond aesthetics. Improved surroundings contribute to a positive living environment. Enjoy meals and gatherings in an inviting and stylish setting.
As you admire your handiwork, consider the advantages of personalized design. The space now reflects your tastes and vision. Share the journey and results with others to inspire more creative efforts.

Additional Resources and Further Reading
For more tips on cabinet painting, explore online forums and DIY blogs. They offer insights and experiences from fellow home renovators.
Books and video tutorials can provide detailed guidance and inspiration. These resources will help you perfect your technique and discover new creative ideas.
Views Expressed Disclaimer
The views, opinions, and information presented in this article are for informational purposes only and do not necessarily reflect the official policies or positions of Chagrin Falls Painting. While every effort has been made to ensure accuracy, Chagrin Falls Painting is not liable for any errors, omissions, or decisions made based on the content provided. Readers are encouraged to consult professionals for specific advice or assistance related to their unique circumstances.


